Perhaps the weakness of the Facebook social network is that images are always blurred and reduced in quality when posted on this platform. Fortunately, there is a way to fix it, and the article below will give specific instructions on how to post photos on Facebook without blurring, refer to it now.
Why are photos posted to Facebook always blurry and of low quality?
Blurry images uploaded to Facebook are not a system error as many people mistakenly believe. In fact, the only reason is to increase the loading speed of the website for users. To do that, Facebook created a system to compress all images into a common format. Since this process is automatic, your images may be reduced in quality when uploaded to Facebook due to the platform's image compression system.
Facebook supports images with resolutions of 720px, 960px, and 2048px width. Any image file with a resolution other than these three levels will be degraded when you upload it to Facebook. Reducing the resolution of a photo also means that the overall quality and contrast will be significantly reduced.
However, there are two ways to make sure your photos are clear and not blurry when posted to Facebook: adjust the image width; and change the settings in Facebook.
See also: Maxcare unlimited account nurturing and interaction software
Change image width to post clear FB photos
As mentioned above, Facebook supports three main image resolutions: 720px; 960px; and 2048px. If your image is exactly one of these three widths, it will retain its original quality when you post it to Facebook. And there are two things you need to do with your image before posting it to Facebook to make sure it looks sharp:
- Adjust image width
- Change image file
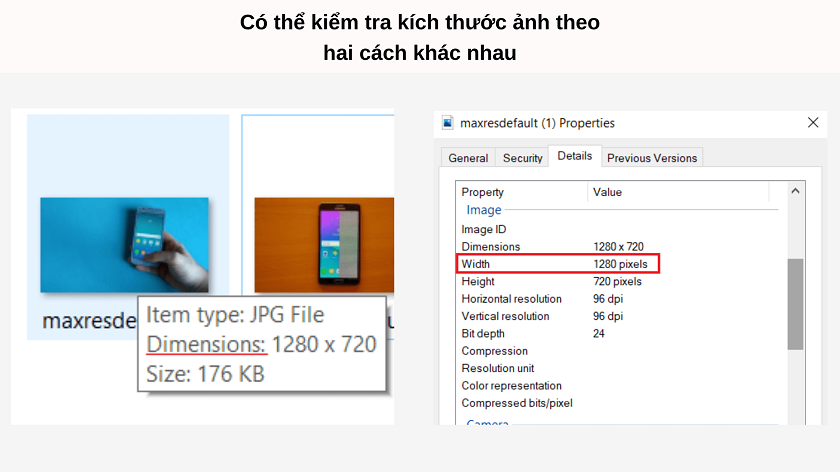
First, we will resize the image. On your computer/laptop, you can check the image size by hovering over the image and looking at the Dimensions line. Alternatively, you can also right-click on the image and select Properties -> Details. Details about the horizontal and vertical dimensions of the image will be displayed here.
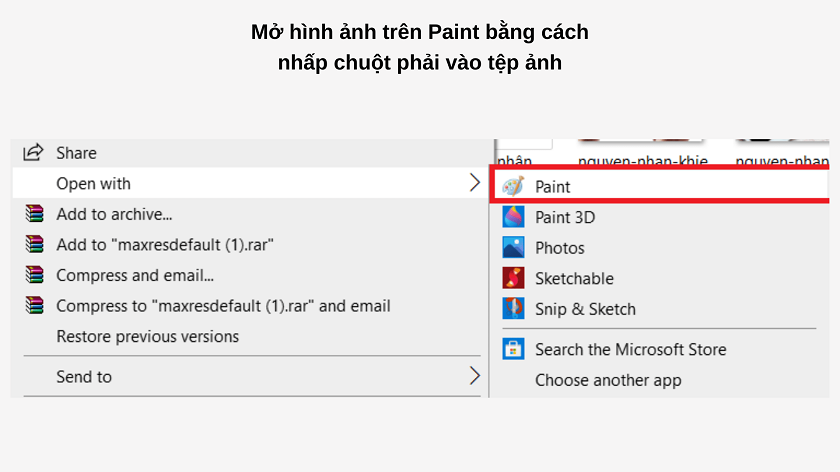
And to convert the horizontal orientation of a photo, right-click on the photo and select Open with -> Paint to open the photo in the familiar drawing application Paint.
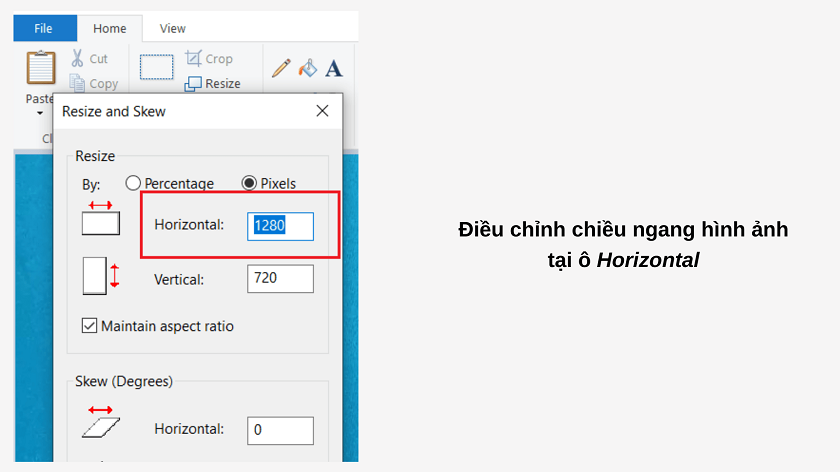
On the Paint toolbar, click Resize or press Ctrl + W to open the photo resizing window. In the Resize section, click on Pixels. Next, enter one of the three pixel numbers above in the Horizontal box.
Moving on to the final step is converting the image file. To optimize the quality of the image, we will use a PNG file. If your image is default PNG, you can press Ctrl + S to save the edited size.
But if it's another file, you can convert it to a PNG file right on Paint. Specifically, go to File -> Save as -> Select PNG Picture file -> enter the image name and save location as desired -> click Save. That's it!
See also: MaxPhoneFarm Facebook Phone Account Farming Software
How to post photos on Facebook without blurring, clear
Additionally, you can also change your Facebook photo upload settings to ensure that your uploaded images do not lose quality. You can change the settings by following these steps:
- Step 1: Log in to Facebook, click the arrow on the far right and select Settings & Privacy.
With your phone, click on the icon with three horizontal dots arranged vertically on the far right, scroll down and select the item as above.
- Step 2: Go to Settings -> Options -> Media Files.
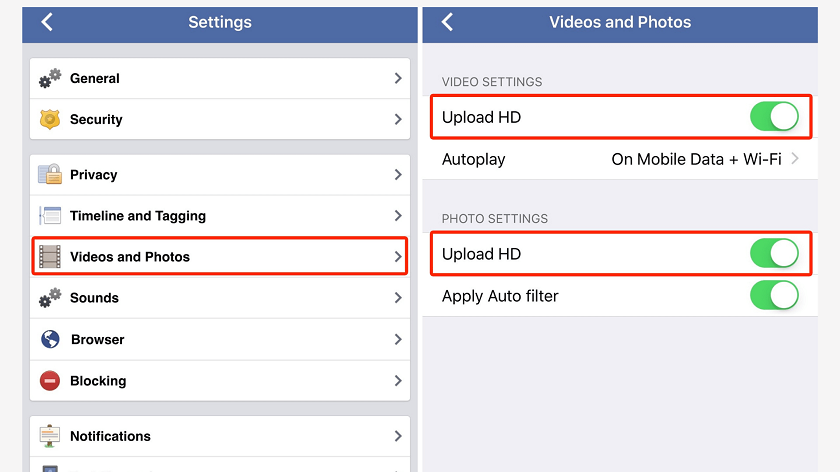
- Step 3: In the Video and photo settings section, click on the Upload HD photos line.
And that’s it! Next time you upload a photo to Facebook, follow these steps to keep your photo album sharp and free of blur. Good luck!
Contact page now MINSoftware or join the group MINSoftware Community for more interesting and detailed information about the software ecosystem and Facebook!


